Math Origami Cube
Fun Lesson Plan Idea
I've used this great little origami cube lesson plan over the years in many situations both as a substitute teacher and as a regular class teacher.
It crosses many educational "boundaries" and curriculum areas including Math and Art and Craft and Origami to name but a few.
I'm sure you'll see an interesting educational advantage from your point of view too.
Once you've constructed it a few times you can literally make it "with your eyes closed", as they say.
Just follow the instructions on this page and make a few yourself before you try it with an actual class.
I've been successful teaching this origami cube lesson plan from Year 2 (ages 7-8) to Year 6 (ages 11-12).
The older they are obviously the more successfully and quickly they'll construct the cube but you can manage with a younger class, though with more help and much slower instructions.
Getting them to make it on their desk in front of them as you demonstrate out the front of the class, making it "vertically" on the blackboard is useful.
Sometimes I've demonstrated the construction method on the blackboard by pre-preparing each of the folding steps of the cube with the separate bits of origami paper and displaying them in order.
That has worked well in the past.
I'll show you the steps now via photographs below.
The order of the folding is the actual lesson plan content.
Where you decide to teach the actual lesson plan i.e. math, craft etc is up to you but it fits many educational areas.
Keep reading:
Origami Cube Step 1
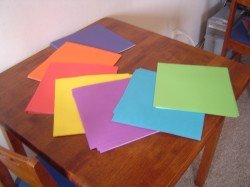
First of all you need to select six (6) pieces of colored origami paper.
You can select multi-colors e.g. six separate colors or just 2 or 3 complimentary colors.
That is up to you and your students but even a cube of 1 color can look spectacular if made well.
Now for Step 2:
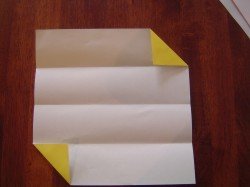
Origami Cube Step 2
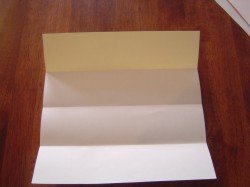
The next step is to fold each piece of paper into halves and then into quarters.
A little word or warning now - You must get the children to fold slowly AND accurately, making sure they make what I like to call "nice, sharp folds".
This is because the earlier they make an accuracy mistake the more the mistake will be magnified as you proceed with further folding.
So just "tortoise it", yes that's right..."slow and steady wins the race."
Back to folding. You can either fold all 6 pieces at once or fold one complete side first it is up to you...
I've found in the past that it is best to go through the full instructions with 1 piece of paper first.
If the child makes a mistake along the way it means that only one piece of paper is wasted instead of the whole six.
Some children can get pretty discouraged quite easily so it's handy if you know the temperament of your children before you start.
I know that's not always possible when you're a substitute teacher but another tactic for you could be to go slower than normal but let the able child go ahead if they'll get bored waiting for the less able.
It's good to establish that this exercise is not a competition for the children and they can basically work at their own speed with lots of support and encouragement from you, the teacher.
Now for Step 3:
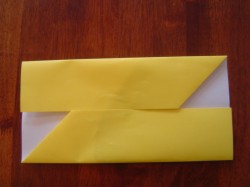
Origami Cube Step 3
The next step is to fold the top right and bottom left quarters to make a little triangle shape that reveals the colored side...
Again, make sure the children fold exactly on the quarter lines or you'll be risking a poorly constructed cube at the end of the lesson.
Now for Step 4:
Origami Cube Step 4
Next just fold the outside quarters back to the center which shows mostly the colored sides but then reveals 2 small white triangles now. Like this...
Now for Step 5:
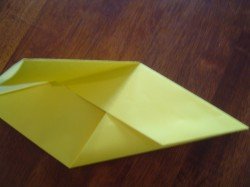
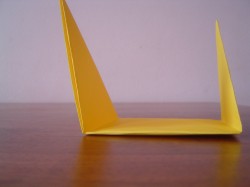
Origami Cube Step 5
Next you fold the bottom right half of the paper up to the top, making sure to fold right on the edge and making a "sharp", accurate fold...
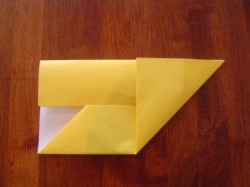
You can see in the picture above that the whole right side of the paper is now along the top.
I say to the children at this point that it now looks a bit like a boat shape.
It helps to use images that are easy and they are familiar with as this helps their visualization and can ten to reduce tension, doubt and uncertainty, especially if the child is inexperienced in origami or lacks fine-motor development.
The more you can re-assure the child, the fewer problems you'll have with the lesson plan.
Now for Step 6:
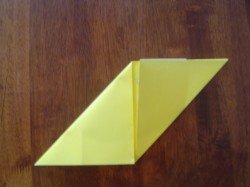
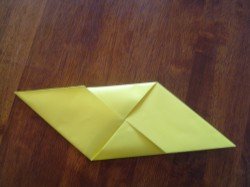
Origami Cube Step 6
Now fold down the other side i.e. top left downwards towards the bottom middle.
It should look like a parallelogram now which can give rise to the discussion of more mathematical language - especially if the students are older...
Now for Step 7:
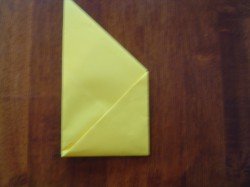
Origami Cube Step 7
Now comes the most confusing and perplexing part of the exercise for the <b>children</b>.
I put children in bold because it should not really be hard for you, the teacher.
It just takes a little getting used to and some clear explanation on your part so that the moves are clear in the children's minds.
You may have to show this step a few times before some children get it right.
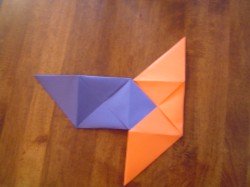
The <b>top flap</b> on each side is folded <b>UNDER</b> the <b.bottom flaps</b> on each side of the paper like this...
So when it's finished it looks like this...
You physically lift the bottom flap up and tuck the top flap underneath it until it makes a snug fit on both sides.
At this point I usually say it looks like a "Ninja Star" and the children usually have a good laugh and are excited by that idea.
If you're confused by this step, watch the video above and it makes it a little more clear by actually demonstrating the folds.
O.K. nearly finished one side!
Now for Step 8:
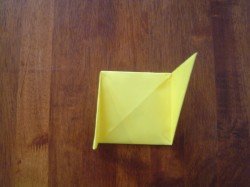
Origami Cube Step 8
Flip the paper over so that the folded side is face down on the table.
Place the paper vertically on the table i.e. the points are facing up and down.
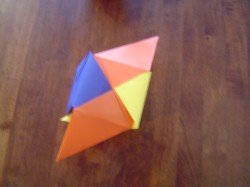
Then you fold the pointed side upwards and downwards on each side to form 2 triangles (2 triangles make a square)...
When that's done you fold the triangles perpendicular (more math language to discuss)to the other sides like this...
And looking from the other side...
Now for Step 9:
Origami Cube Step 9
You should be able to place each finished side on top of the others as you finish folding them.
You can then see if all the flaps are facing the same way.
If you don't fold each one in EXACTLY the same manner, e.g. you start one of the first folds "top left" instead of "top right", the flaps will be facing the wrong way and you won't be able to fully construct the cube.
Presuming you have done all steps correctly to this point you may now start constructing the cube via tucking in all flaps.
This is another very important point to note at this stage!
You must place all sides perpendicular to each other when tucking in the flaps on each side.
If you tuck them in the same way then some flaps will be rendered useless inside the cube and it won't "hold together" as it should.
Here is how it should look...
And keep inserting sides in the same manner until the cube is fully constructed...
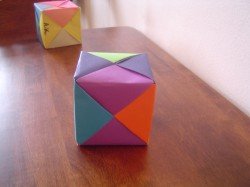
When you're finished you should be able to roll your cube along the ground (lightly of course, it's just paper) and the cube should hold together.
And it looks great too!
Are you ready for Step 10?
Origami Cube Step 10
Display, play with and definitely ENJOY your cube!
Some other points to note are that each flap is tucked into its nearest cover flap from the other piece.
Don't try to reach out across the other side of the cube to tuck in the flaps.
Also you can experiment with different colors to get the desired effect that you or the children in your care desire.
I hope you enjoyed this little lesson plan.
It's a lot of fun and both you and your children/class should enjoy it immensely.
You can now also talk about the properties of a cube namely: 12 sides; 8 corners; 6 faces, which could then lead into another lesson on the properties of other shapes.
Which ever way you decide to go...
Have fun!
For more detailed information about cubes go here...
Update Extra
How to Make a Square From a Rectangle
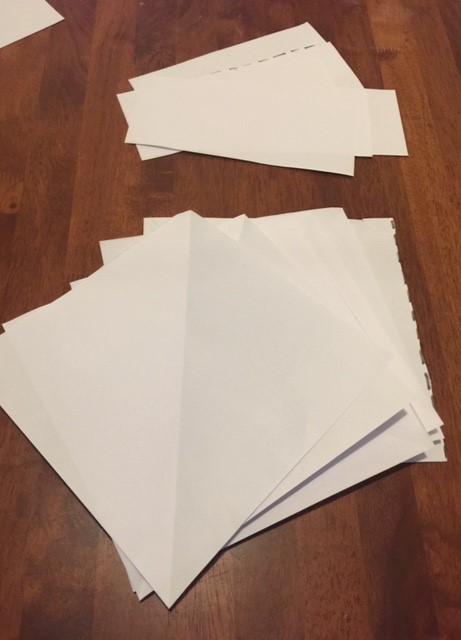
If you don't have square pieces of paper there's an easy 'work-around' to make them.
And if you've only got white 'office paper' your children in the class can always either colour the paper or make interesting mathematical patterns on them.
Let's do this:
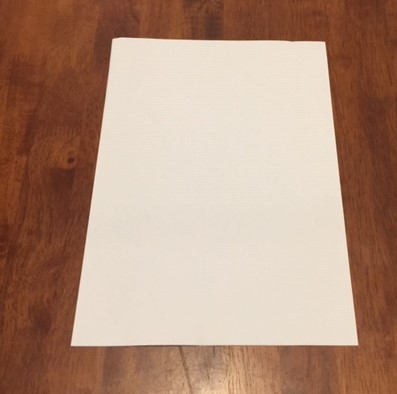
Step 1:
Take a plain or coloured sheet of paper and lay flat on a flat surface...
Step 2:
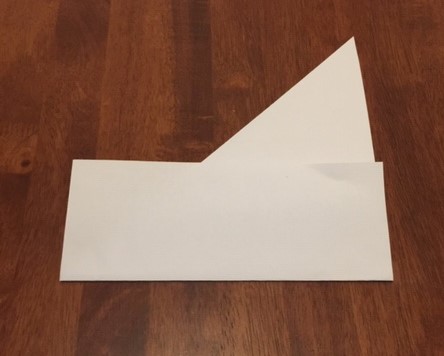
Bend either the top left or right corner down until the top edge is in line with the opposite side and you have made a triangle shape...

Step 3:
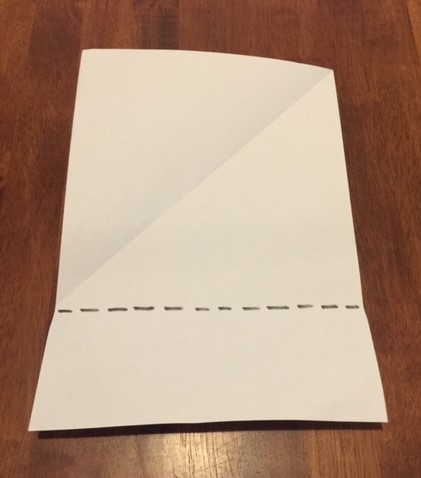
Fold the bottom rectangle shape over the triangle to make a nice 'sharp' edge...
Step 4:
Fold the rectangle and triangle shape back out so you see the fold lines.
Now cut along the rectangle line so you're left with only a square shape (consisting of 2 triangles...
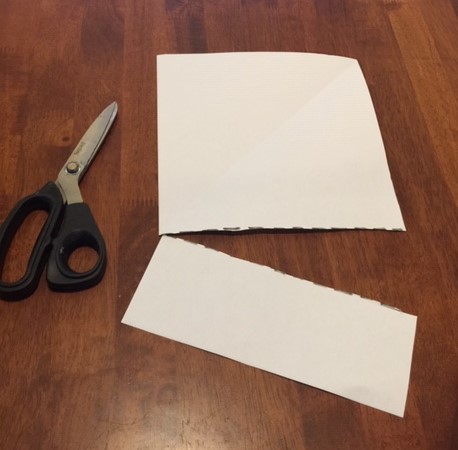
Step 5:
Repeat this process another 5 times so you have your 6 sides of your cube.
Then, decorate your squares, colour in, or used coloured pieces of paper (rectangles) to begin with.
You are now ready to make your cube as per the instructions at the top of this page!